After the initial tooling set-up has been made, study the bent part to determine what tools to adjust to make a better bend. Keep in mind the basic bending principle of stretching the material on the outside radius of bend and compressing the material on the inside of the bend. Make only one adjustment for each trial bend unless the second adjustment is very obviously needed. Avoid the tendency to first increase the pressure die force rather than adjust the wiper die or mandrel location. Start with a clean, deburred and lubed tube with the elongation properties sufficient to produce the bend. Note: There are certainly other corrections that could be made for the following problems. These illustrations are a few examples of how to “read” a bend and improve the tooling set-up.

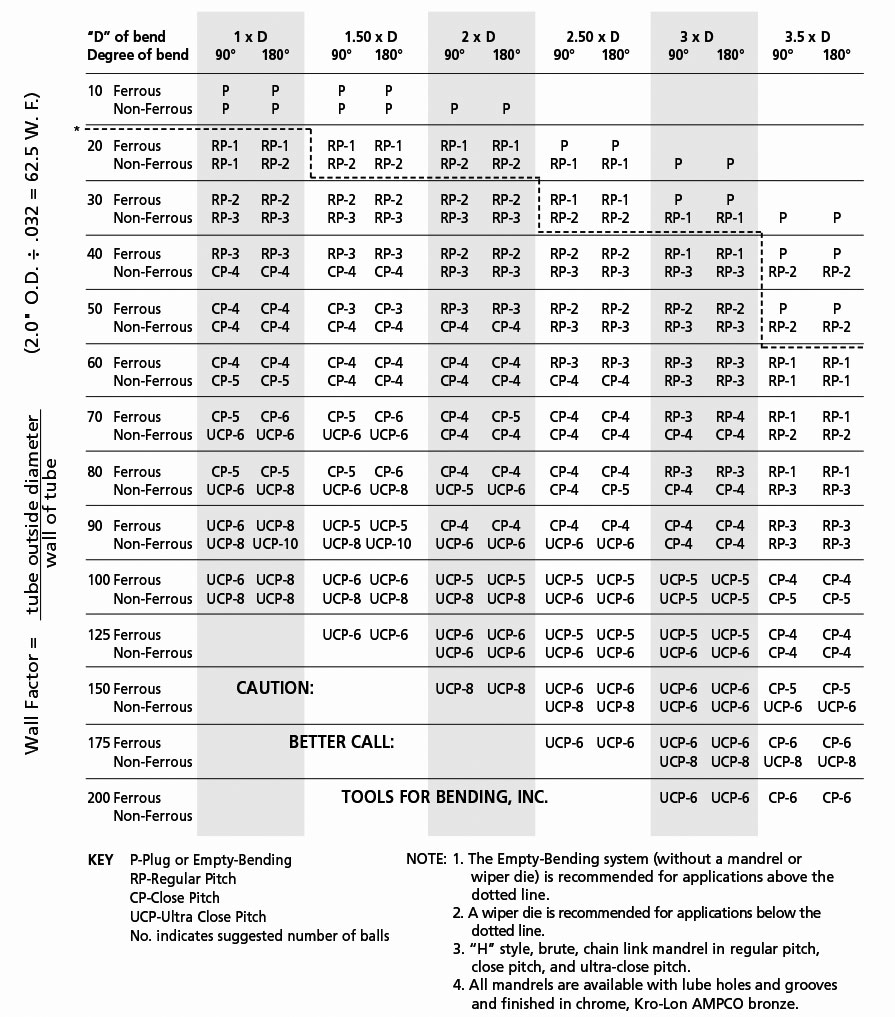
TOOLING SELECTION GUIDE
“D” of Bend = centerline radius tube outside diameter (2.0 C.L.R. ÷ 1.0″ O.D. = 2 x D)